iQOO 9 SE FRP bypass using a very simple and easy to follow FRP unlock method. This guide is useful to bypass Google account verification from iQOO 9 SE device. By using the easy to follow steps in this guide you can bypass google account from many iQOO devices in 2021. After performing hard reset or soft reset, if you are facing “Google account verification” screen on your device then follow this guide to unlock FRP completely.
This will also help you to re-enter your own Gmail account into your phone. As in future resetting your device will be a lot easier as you won’t face Google account verification screen.
This is the free guide, you don’t need to use any third-party software or computer. Each and every single step is elaborated with the images so that you don’t face any problem in the procedure.
iQOO 9 SE FRP Bypass and Remove Google Verification:
iQOO 9 SE device is most likely to have this security feature FRP aka Factory reset protection feature. Which makes your device more secure accessing from any third-party involvement.
Factory Reset Protection or FRP bypass from iQOO 9 SE is not difficult and there are many ways which can be used to deactivate FRP lock from iQOO devices.
FRP Bypass from iQOO 9 SE Android Device Complete Guide:
- Press with 2 fingers on Welcome screen as this will open TalkBack Tutorial. Draw a big “L” on TalkBack tutorial screen and then select TalkBack Settings from the popup window.

2. Swipe UP and select TalkBack tutorial option. Turn talkback off then again swipe UP and tap on Help and Feedback option.

3. Tap on YouTube video title twice to open the YouTube application in your phone. Tap on Share button and choose Gmail.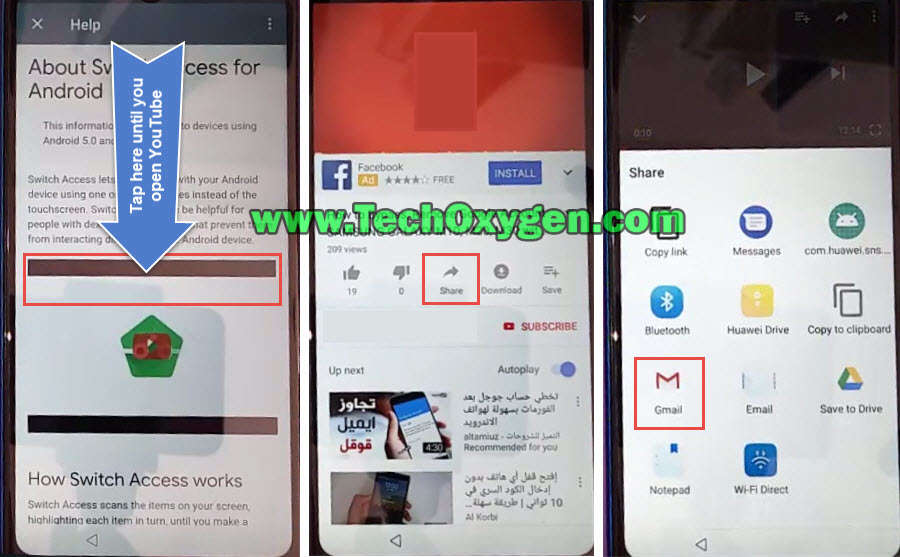 4. Skip the Welcome to Gmail screen and tap on Add and email address. On Set up email screen select Outlook, Hotmail and Live option.
 5. Sign in with your Hotmail or Yahoo mail account. Once you see Your account is Set up message tap on Next button.
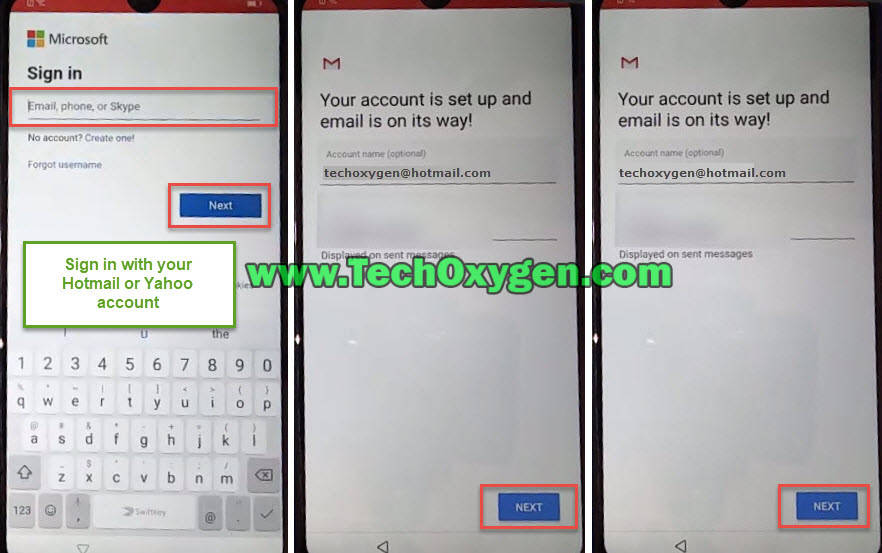 6. Click on Take me to Gmail and tap on the arrow just before the Compose title and again click on three horizontal lines showing before the Inbox title.
 7. Click on down arrow, select “Manage Accounts” and then tap on System.
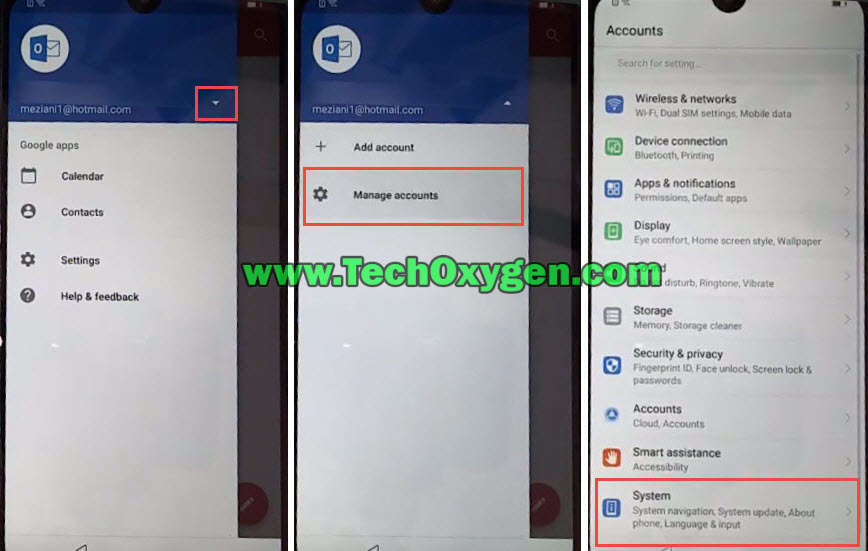 8. Go to the Reset, Reset all settings and then select Reset ALL SETTINGS again.
5 More Steps to remove Google Account in iQOO 9 SE phone:
- After its done resetting all settings, Go back and keep pressing back button until you see “Home Screen” of your iQOO 9 SE phone.

- Once you reach to the Home Screen, go to the Settings, System and the About phone.
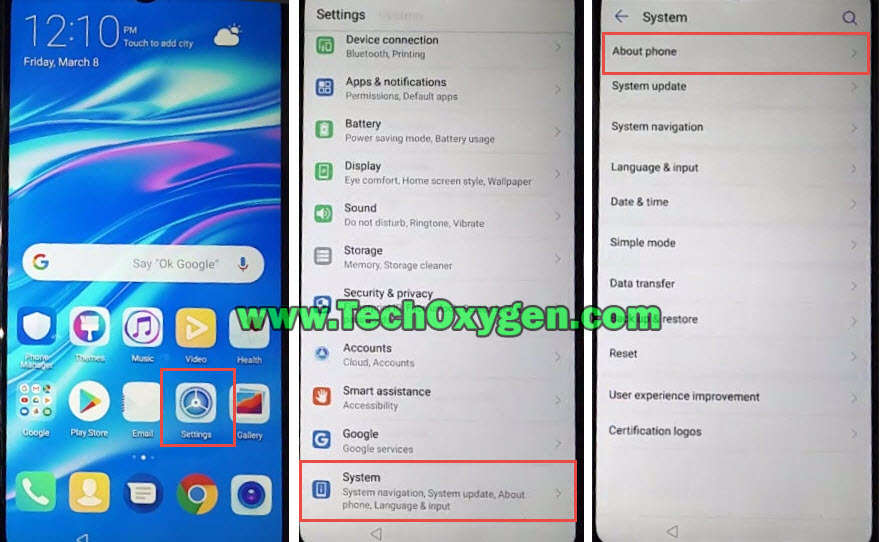
- Inside about phone option, tap on Build Number 5 to 7 times to activate the developer feature. Then go back and select “Developer Options”.
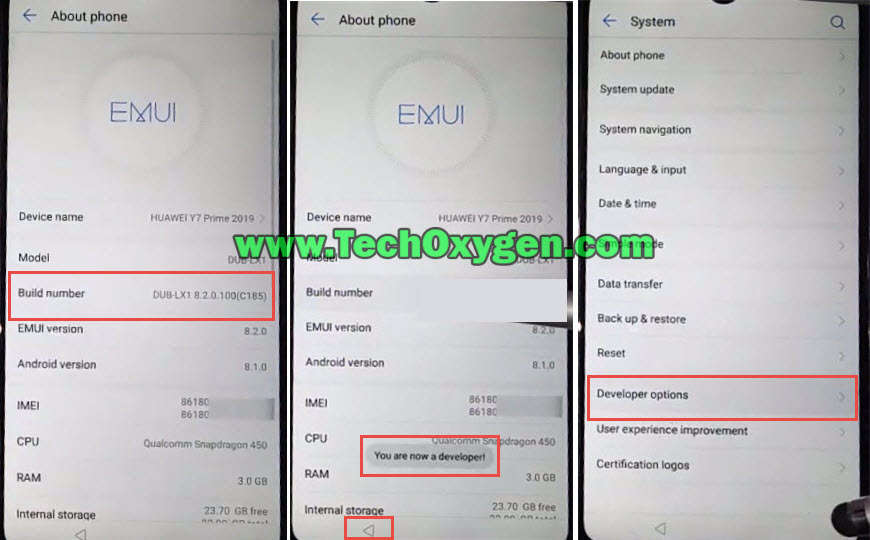
- Enable OEM unlock from developer options and then go back to Reset the device.

- Select “Factory Data Reset” then select Reset phone and again click on RESET PHONE to start the procedure of resetting your iQOO 9 SE FRP Bypass device.

This will take 10-15 minutes to complete the resetting procedure in your device. Welcome screen will popup and you can now use your device once again without any “Google Account Verification” screen.
Summary:
In any case you find no luck by using this free method to bypass Google verification lock from iQOO 9 SE. If you are facing any difficulties, feel free to ask me in the comment below.